Postings (previously called “Classifieds”) is an online place where Residents (and Management) can share or request items for sale, events in the area, requests for assistance, and more. Residents view and update this information through the Resident Portal, Management views and updates this information through the Management App.
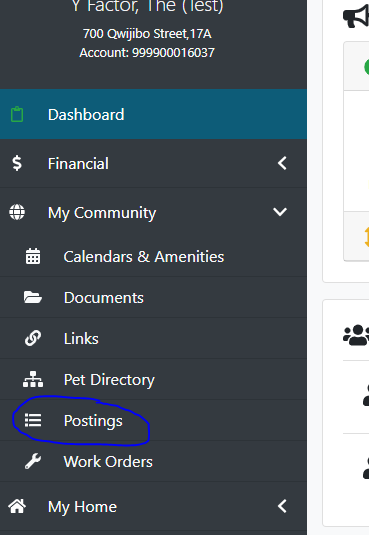
Through the Management App, click on the Postings tab.
![]()
If you would like Postings to be made available for your Association, please submit a request to support@actionlife.com to turn the feature on. You can tell if this feature is available for your Association by accessing your Association through Association Search in the Management App and seeing if there is a Postings tab. If the tab is not there, the feature has not been turned on.
Managing Categories
When the Feature is first enabled, you will need to setup the Categories that your Association can post items under. There are Categories and Sub-Categories. Below is an example of some default Categories that Associations have used:
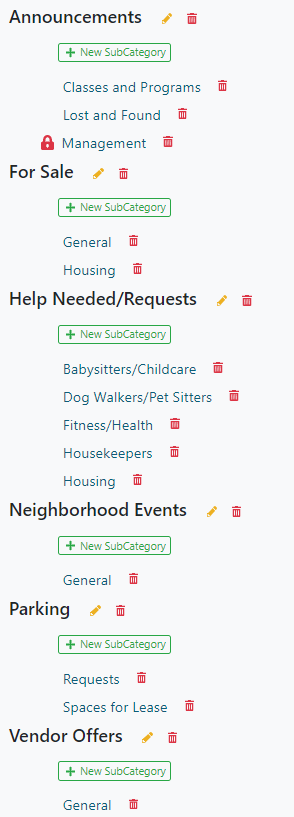
To create a Category, click the New Category button.

Fill in the Title field and click Create.

To create a SubCategory, click the New SubCategory button under the Category you would like for it to be under.

Fill in the Sub-Category Title field.
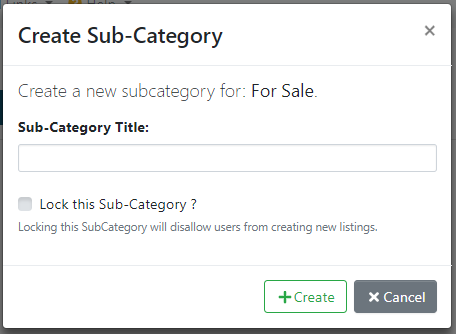
If you choose to “Lock this Sub-Category”, only Management will be able to Post items under this specific SubCategory.
Click Create.
To change the name of a Category, click the Pencil icon to the right of the Title. To delete a Category, click the trash can icon. Deleting the Category will also delete ALL SubCategories for that Category and ALL Posts under all of the SubCategories.
![]()
To change the name or adjust the the Lock of a SubCategory, click on the SubCategory title in the left navigation bar, then click on the name above any current Postings.

You’ll be able to Update the desired information in the window.

To delete a SubCategory, click on the trash can next to the title in the left navigation bar.
![]()
Creating Posts – Residents
Residents will be doing most of the Posting through the Resident Portal. There is a Tech Note that you can provide to them located at H:\RESIDENT PORTAL to help them use the feature.
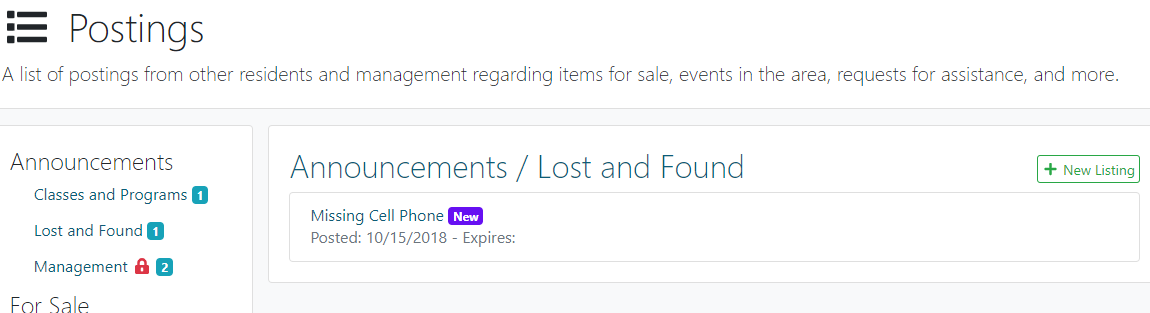
For quick reference, they will find the Postings section under My Community in the left hand navigation bar.
They will then see the same Categories and SubCategories that you see in the Management App. They will then click New Listing to add new items
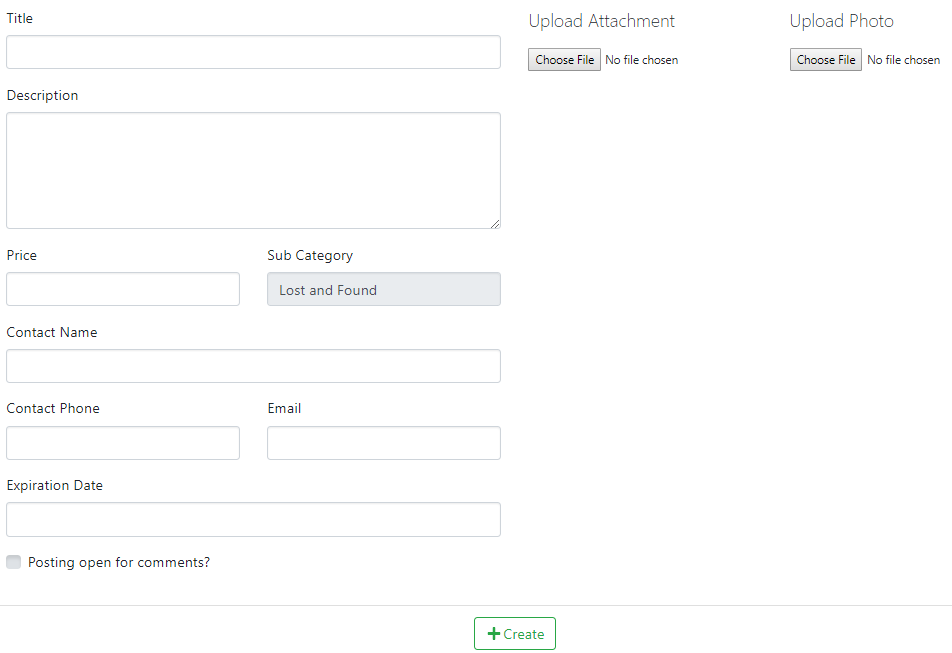
At the moment, Residents can only attach one attachment and one photo to a Post. If additional items need to be attached, they will need to send them to you to attach through the Management App.
Creating Posts – Management
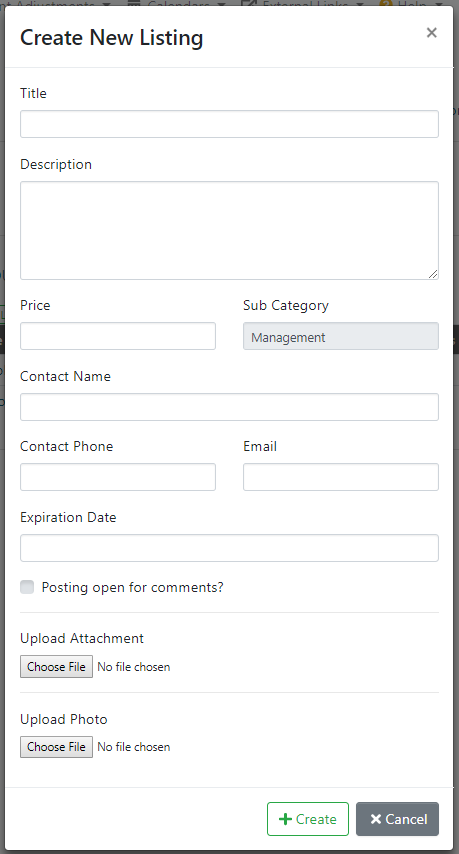
Access the Postings tab in the Management App and select the SubCategory that you would like to Post under.
Click the New Listing button.

Fill in the information for the Listing (only Title, Description, and Contact Name are required). If you select the option for the post to be open for comments, this will allow Residents to comment and reply on the post to ask questions and express interest. When creating the Post, you can only upload one Attachment and one Photo, but you will be able to go in and edit the Post to include more after it’s been created.
Approving Posts
By default, anyone that has the ability to Approve Posts for an association will receive an email when a Post has been created and needs to be approved.
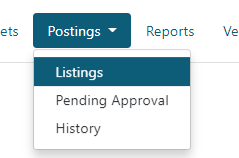
Once you receive the email, go to the Postings tab in the Management App. Once you’re on the tab, there are two ways to view Posts that are Pending Approval.
Click on the Postings tab again and select the Pending Approval dropdown or click on a SubCategory and click the yellow Pending Approval button.

![]()
To easily approve/reject a post, click on the Approve/Reject buttons in the table. If you choose “Reject” from this screen, you will be able to provide a reason the Post was rejected to the Resident.

You can also click on a Title to view the content of the Post. If the information is ready to Post, change the Status to Approved and click Update. You can also Reject the post (please note that if you Reject from this screen, you will not be able to provide a reason for the Reject status).

The Resident will receive an email that their Post has been Approved.
View Expired and Rejected Postings
To view Posts that have expired or been rejected, click on on the Postings tab and then select History from the dropdown.

Click on the Title to view details.
From this window, you can Approve a Post that was previously Rejected. You can also adjust an Expiration Date to have it appear again.