SnapHOA Violations – My Queue
Your “My Queue” is where you will find all your Violation Errors, Pending Approval, and Ready to Print (if you are printing onsite).
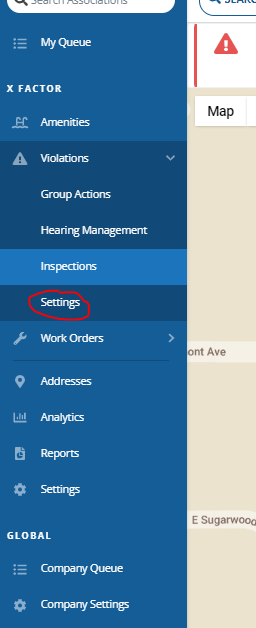
Navigate to “My Queue” on your left side-bar.

Violation Errors
- This will display any ‘Missing Citation’ and ‘Missing Sub-Type’ errors for violations.
- These must be fixed before sending out a non-compliance letter.
- To fix any ‘Missing Sub-Type’ errors, click on “Edit” to navigate to the violation page to ‘Change Sub-type’.
- To fix any ‘Missing Citation’ errors, navigate to your Violations – Settings – Types setting and search up the violation type to edit the ‘Citation & Directions’ (Refer to the Violation Types – Creating/Editing manual for more information).

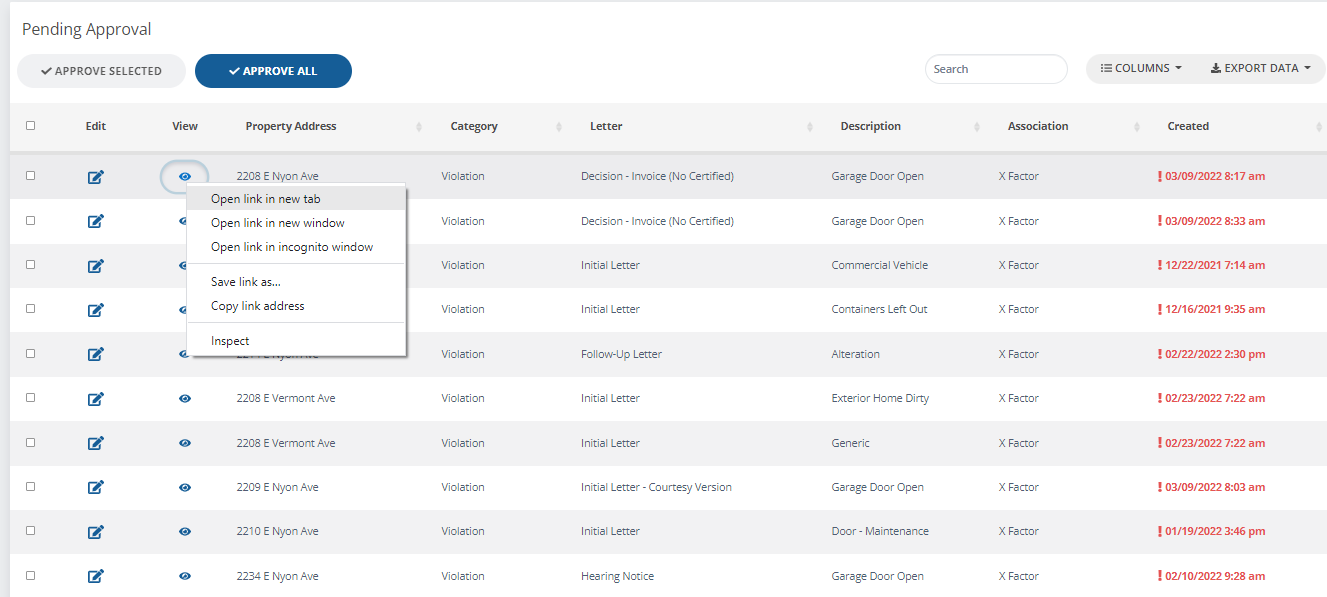
Pending Approval
- This is where you can edit/approve any created letters.
- All letters must be approved by the manager before mailing out.
- Click on ‘View’ (eye symbol) to view the letter template and approval page.
- Recommendation: Right click on the ‘eye’ symbol and select “Open in new tab” to open multiple tabs for a more efficient method.
- Recommendation: Right click on the ‘eye’ symbol and select “Open in new tab” to open multiple tabs for a more efficient method.
Ready to Print
This will only apply to associations that are printing ON-SITE
- If your association is printing on-site, it is your responsibility to make sure letters are printed and mailed. CPS DOES NOT PRINT LETTERS ON YOUR BEHALF.
- This is where all approved letters will appear and display when they are ready to print.
- Click on “Download” to print and mail all approved letters.
- Once downloaded, all letters will be separated into “First Class Mail” and “Certified” folders.
- It is important to note that if a letter is set to be sent out ‘First Class Mail’ AND ‘Certified’ the document will appear in BOTH folders. (This means you do not need to print out 2 copies in one session, you can simply print out all letters in each folder)
- All printed letters will then appear in your “Recently Printed” category.
*Note: if your association is set to have CPS print letters, the standard turnaround is within 48 hours after approval*

SnapHOA Violations – Group Actions
Group Actions will allow you to escalate multiple previously sent violation letters to the next letter (flow of order is determined in your Violations – Settings – Letters order settings)
1. Navigate to Violations – Group Actions tab on the left side-bar.

2. Select all addresses you want to escalate and select “Escalate Selection” (You can see what the next letter will be under the ‘Next Letter’ category).

3. All letters will be automatically generated and ready for editing/approval in your “My Queue” or on each violation page.
SnapHOA Violations – Letter Templates
Editing a Letter Template
1. Navigate to your association Settings – Violations – Letters
2. Select the ‘pencil and paper’ symbol to edit an existing letter template
 3. Make any changes necessary (Title of letter, Delivery methods)

4. Click “Edit Template” to change specific verbiage in letter
Creating a new Letter Template
1. Navigate to your association Settings – Violations – Letters
2. Select “+Create New Letter”

3. Customize Letter settings

4. Select “+Create letter”
5. Make any verbiage changes on the new letter template and click “Save”

Notes
- Each association may choose to use different verbiage from the default company settings. This is why it is important to go over each letter template and make any changes that best fit your association’s word style.
- The purpose of a letter template is to generate all newly created letters in the format of the template. This allows for consistency and efficiency.
- You can “Reorder” the letter templates to best display the flow of letter order. See Below.

SnapHOA Violations – Settings: Overview
This is an Overview of your Association’s SnapHOA settings
Navigate to your Association Settings tab on the left side-bar.
This is where you can change your Association, Violations, and Work Orders settings.
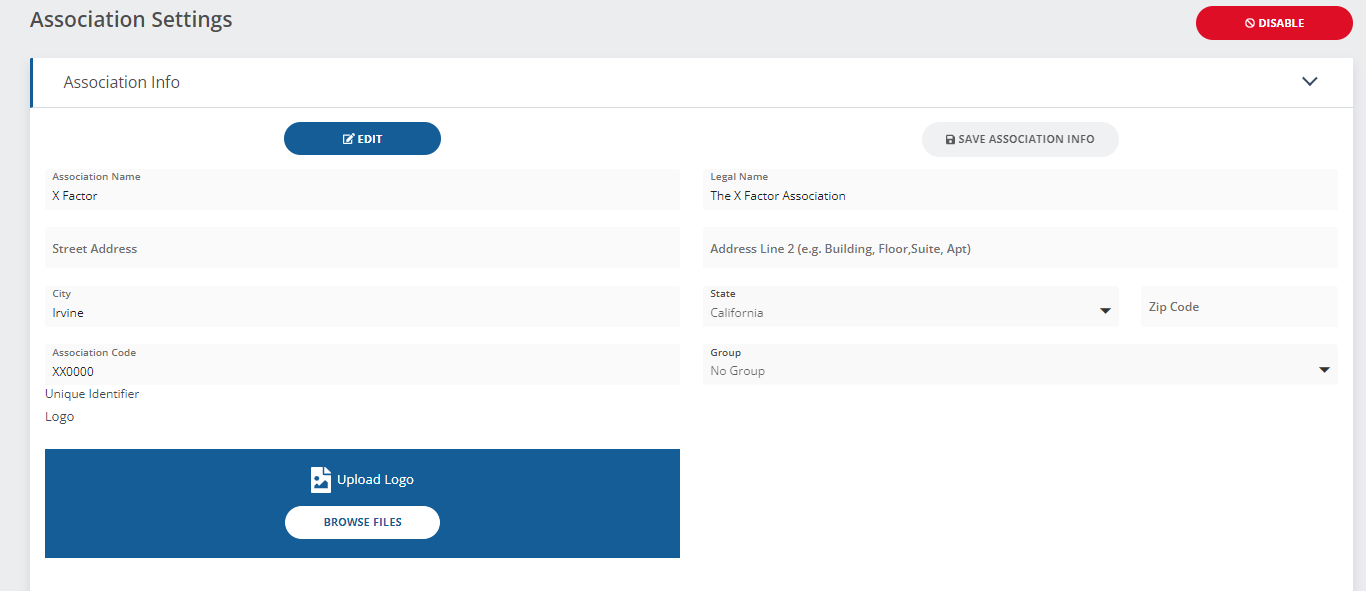
Association Settings
You can edit:
- Association Name
- Street Address
- Logo
Note: You must click on “Edit” before editing
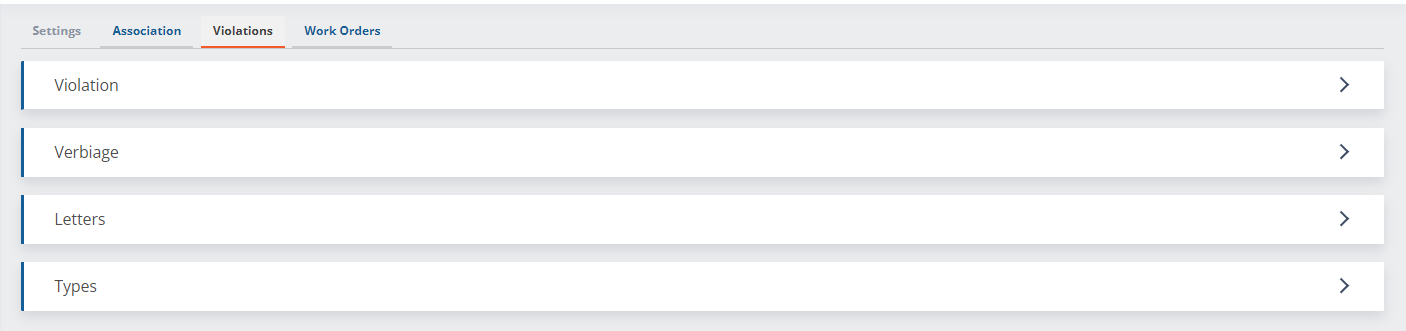
Violations Settings
This is where you can edit:
- Violation
- Verbiage
- Letters
- Types
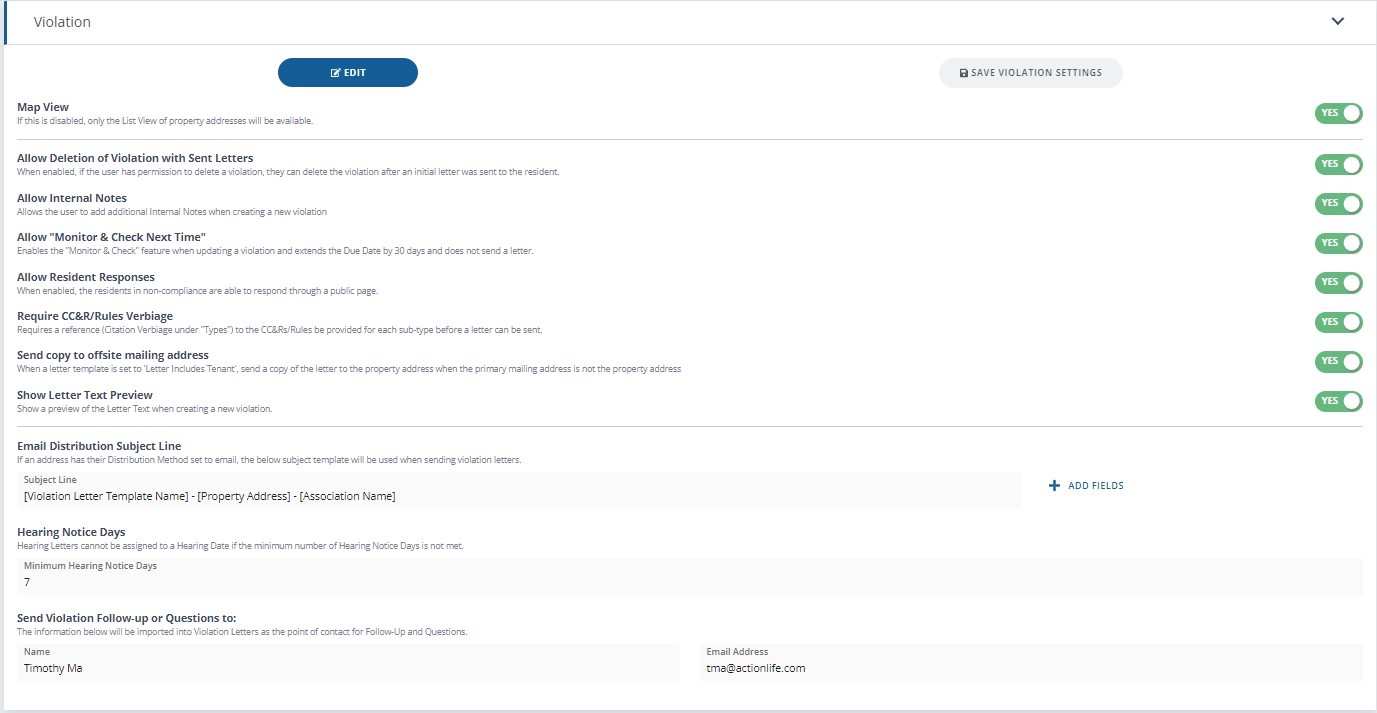
Violation
You can turn on/off
- Map View
- Deletion of Violations with Sent Letters
- Internal Notes
- Monitor & Check Next Time Action
- Resident Responses
- Requirement of CC&R/Rules verbiage
- Sending a letter copy to offsite mailing address
- Show letter Text Preview
You can edit:
- Email Distribution Subject Line
- Hearing Notice Days
- Violation follow-up or questions name and email
Note: You must click on “Edit” before editing
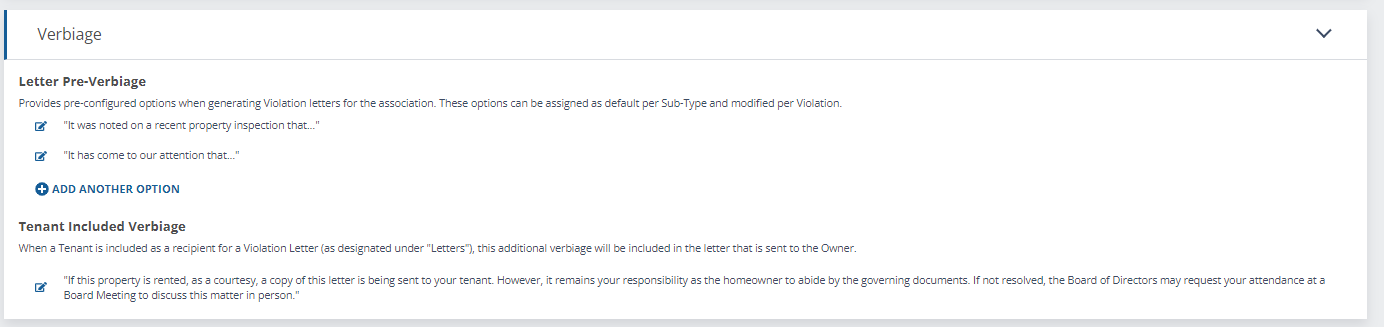
Verbiage
You can edit:
- Letter Pre-Verbiage
- Tenant Included Verbiage
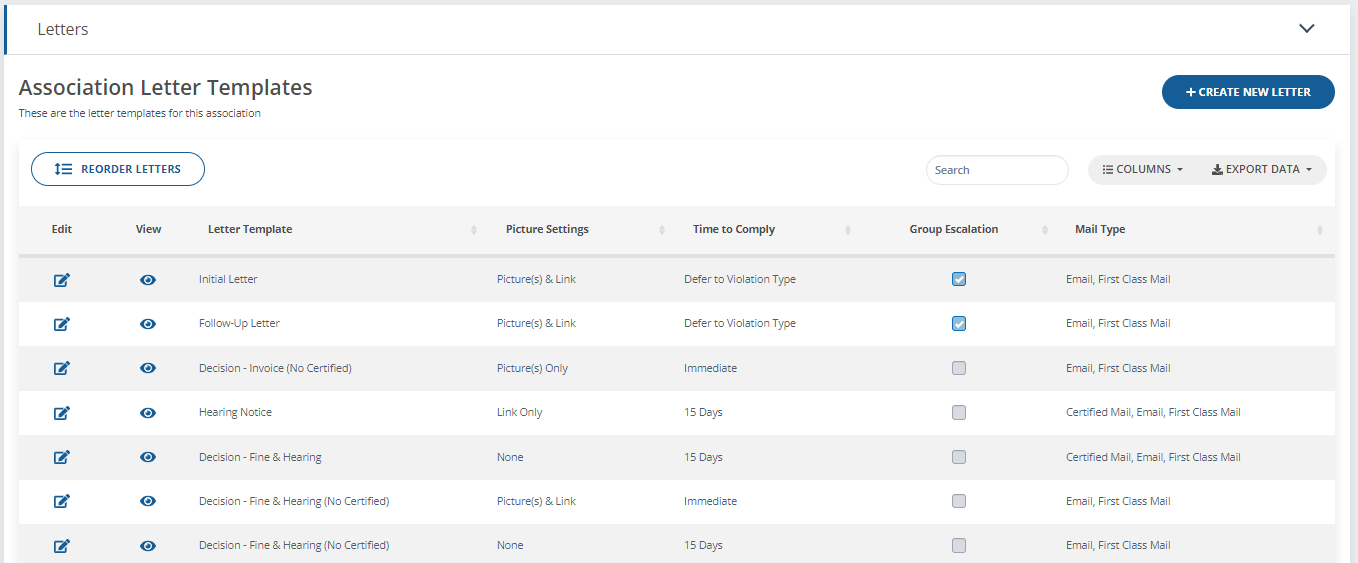
Letters
This is where you can edit your Association Letter Templates.
Note: Refer to “Letter Templates” under Violations for information on how to create/edit letter templates
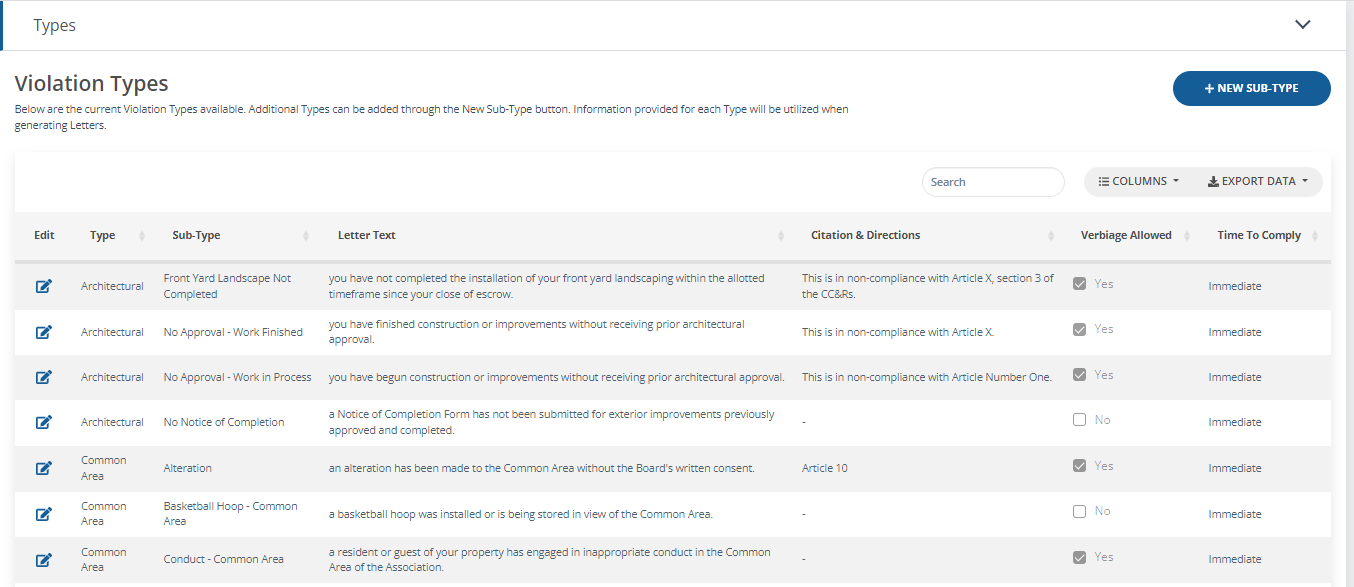
Types
This is where you can add/edit violation types and sub-types. You can also add/edit CC&R & Rules and Regulations citations.
Note: Refer to “Violation Types – Creating/Editing” for information on how to create/edit violation types and sub-types
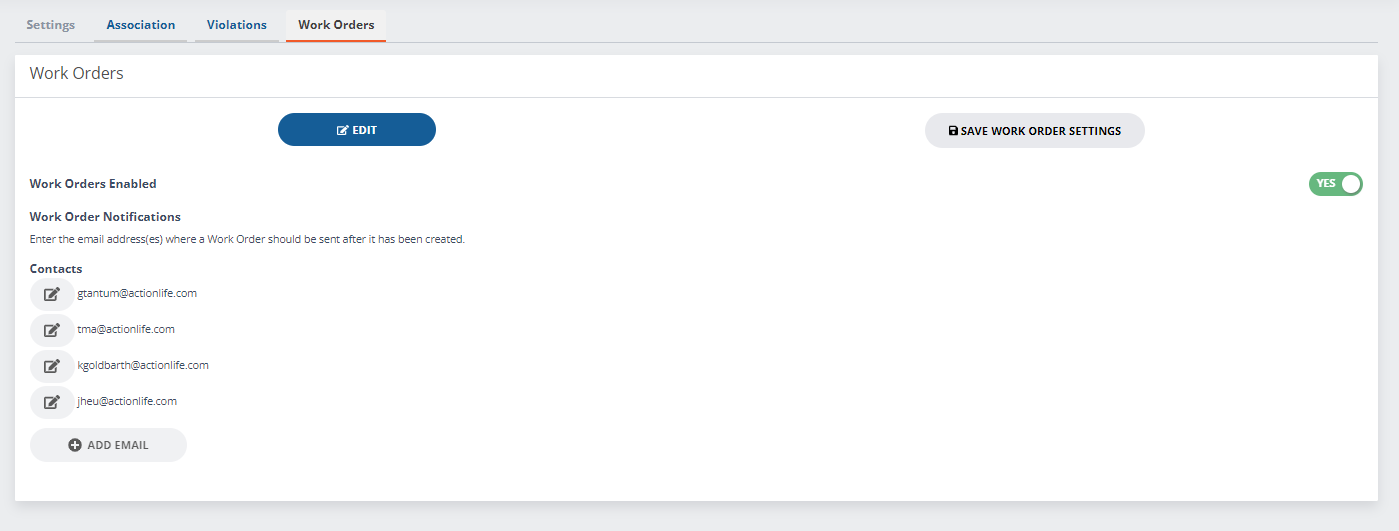
Work Orders
This is where you can:
- Turn on/off Work Orders
- Edit email notifications
Note: You must click on “Edit” before editing
Notes: If you mange multiple associations, you may want to go through each association’s settings and customize individually.
SnapHOA Violations – Creating/Editing an Amenity for Inspection
Follow the below instructions on creating amenities for inspections
Navigate to the “Amenities” tab on the left side-bar.

Creating a new Amenity
1. Click on “+ New Amenity” at the top-right.

2. Select an “Amenity Template”
- Select a pre-made template and edit
- This is SnapHOA’s pre-made amenity templates. It is recommended to edit as necessary.
- Create a “Custom Amenity”
- You will have to create custom “Sub-Areas”
- Clone an “Existing Amenity”
- Ex. North Pool & South Pool

Custom Amenity
1. Create an Amenity Name and select the Inspection Frequency

2. Select “+New Area” and create an “Area Name” and add in “Sub-Areas”.
- “Sub-Areas” are the specific items in an “Area”

3. Click “Submit” once done.
Editing an existing Amenity
1. Select the ‘pencil and paper” icon to edit an existing amenity

2. Make any edits to the “Areas” and Sub-Areas”

3. Click “Save” once done.